How to Clean a K&N Air Filter (Proper Method Step-by-Step)

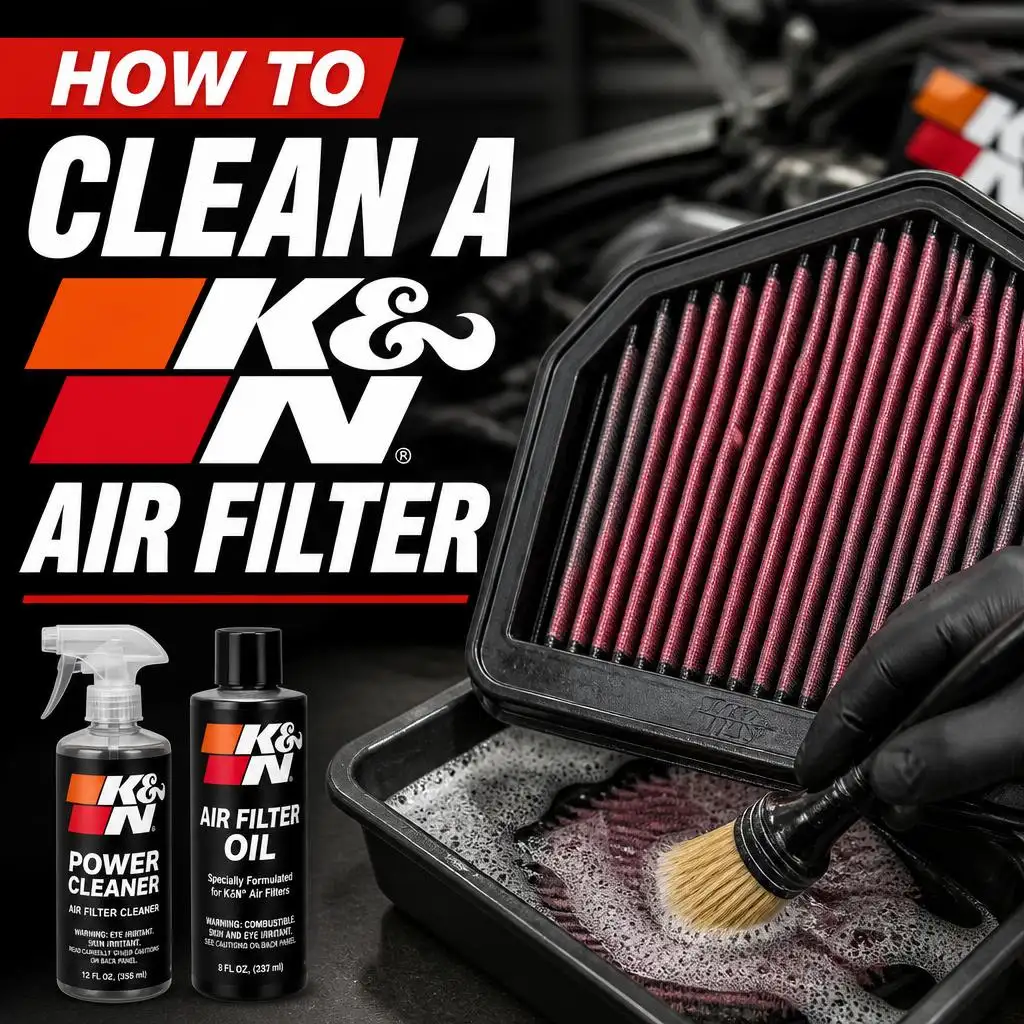
To clean a K&N air filter, apply K&N filter cleaner, let it soak for 10 minutes, rinse with low-pressure water from the clean side out, let it air dry completely, then apply a thin, even coat of K&N filter oil. The entire process takes about 30 minutes of active effort plus drying time.
What You Need Before You Start
K&N sells a recharge kit that includes both the cleaner and the oil. You can buy each product separately, but the kit is the most convenient option if this is your first time.
Supplies you need:
- K&N Air Filter Cleaner (power cleaner spray)
- K&N Air Filter Oil (red aerosol or squeeze bottle)
- A bucket or sink with a gentle water source
- Clean, lint-free cloths or shop towels
- A well-ventilated area for drying
Do not substitute the cleaner or oil. K&N's instructions specify their own products for a reason. The cleaner is formulated to break down the specific oil K&N uses without degrading the cotton gauze media. K&N does not recommend other detergents or solvents for their main air filters, and using unapproved products can void the warranty.
Step-by-Step: How to Clean a K&N Air Filter
Step 1: Remove the Filter from the Vehicle
Open the air box or intake housing. K&N filters are typically held in place by clips or a clamp. Disconnect any intake tubes, unclip the housing lid, and lift the filter out.
Inspect the filter before cleaning it. Heavy oil saturation, torn pleats, or visible holes in the cotton gauze are signs the filter may need replacement rather than cleaning. See the when to replace section below for the full checklist.
Step 2: Apply the K&N Filter Cleaner
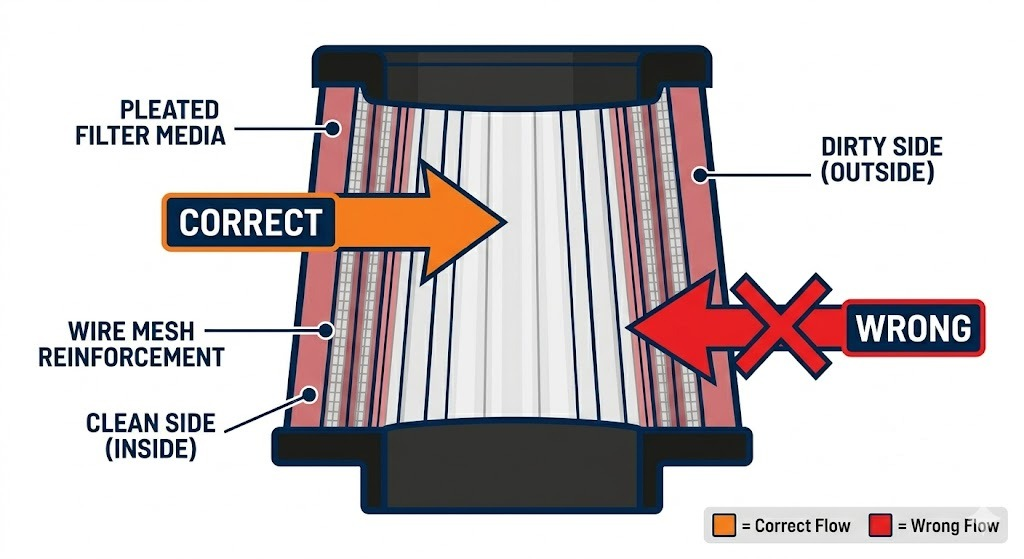
Spray the K&N cleaner generously onto both the dirty side (outside) and the clean side (inside) of the filter. Make sure every pleat is coated.
Let the cleaner soak for 10 minutes. Do not let it dry on the filter.If you are working in a hot or dry environment, keep an eye on it and add more cleaner if it starts to dry before time is up.
Step 3: Rinse the Filter
Rinse from the clean side out. This means you direct water through the inside of the filter outward, pushing debris out the same direction it entered. Rinsing from the dirty side inward drives contamination deeper into the media.
Use low water pressure. A gentle faucet flow or a hose set to a soft spray is ideal. High pressure can damage the cotton gauze or shift the pleats.
Continue rinsing until the water runs clear. Hold the filter up to light occasionally to check that no dark clumps remain in the pleats.
Step 4: Shake Out Excess Water
Gently tap the filter against your palm or a soft surface to dislodge water trapped in the pleats. Do not squeeze the filter or press on the media. The cotton gauze is delicate when wet.
Step 5: Let the Filter Dry Completely
This is the most important step that people rush. Place the filter in a warm, well-ventilated area and let it air dry naturally.
Drying time depends on ambient temperature and humidity. Plan for at least a few hours in a warm room with good airflow. In humid or cool conditions, allow more time. When in doubt, wait longer.
Do not use a heat gun or hair dryer to speed drying. Forced heat can damage the cotton gauze and distort the filter frame. K&N cautions against high-pressure compressed air as well, since it can tear the filter fibers.
The filter must be fully dry before you apply oil. Applying oil to a damp filter traps moisture inside the media and causes uneven oil distribution.
Step 6: Apply K&N Filter Oil
Once the filter is completely dry, apply K&N filter oil to the crown of each pleat on the outside of the filter.
If using the aerosol: Hold the can about 2 to 3 inches from the filter surface. Apply a light, even coat across all pleats. Let the oil wick into the cotton for 20 minutes, then check for any light or uncolored spots. Touch up those areas with a second light application.
If using the squeeze bottle: Apply a thin bead along the crown of each pleat, working around the entire filter. Use the same 20-minute wait and touch-up approach.
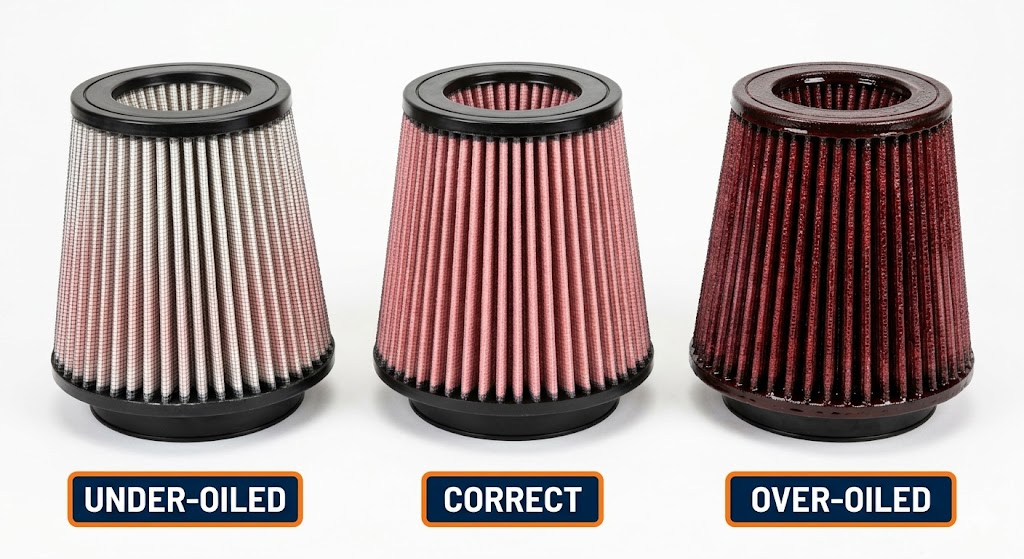
The oil should produce a uniform, lightly saturated red color across all pleats. Bright red with no gaps means you are close to done. White or uncolored sections mean more oil is needed. Dark, heavily saturated sections mean you applied too much.
Step 7: Let the Oil Settle, Then Reinstall
After the final touch-up, let the filter sit for another 20 to 30 minutes before reinstalling. This allows the oil to wick fully and settle evenly across the media.
Reinstall the filter into the air box or intake housing. Reconnect all tubes and clamps. Start the vehicle and check that there are no intake leaks or unusual sounds.
How Often Should You Clean a K&N Air Filter?
K&N recommends cleaning every 50,000 miles under normal driving conditions. That interval is printed on the packaging and supported by their warranty documentation.
Severe conditions change that schedule significantly. If you drive on dirt roads, in dusty environments, or in high-pollen areas, inspect the filter every 10,000 to 15,000 miles and clean it when the pleats are visibly dark and clogged.
A good rule: inspect the filter every oil change. Hold it up to light. If you cannot see light through most of the pleats, it is time to clean.
Can You Use Dish Soap to Clean a K&N Air Filter?
K&N does not recommend dish soap or any detergent other than their own cleaner for their main air filters. Their official position is that products not manufactured by K&N have not been tested and may deteriorate the filter's performance and filtration ability.
The risk with any off-label cleaner is residue and degradation of the cotton gauze media. Dish soap that is not rinsed completely can leave a film that interferes with how the oil bonds to the media after cleaning.
This is one of those cases where using the right tool is the right answer. The K&N recharge kit costs around $15 to $20 and lasts multiple cleaning cycles. That is a small investment for a filter that can otherwise last the life of the vehicle.
What Happens If You Over-Oil a K&N Air Filter?
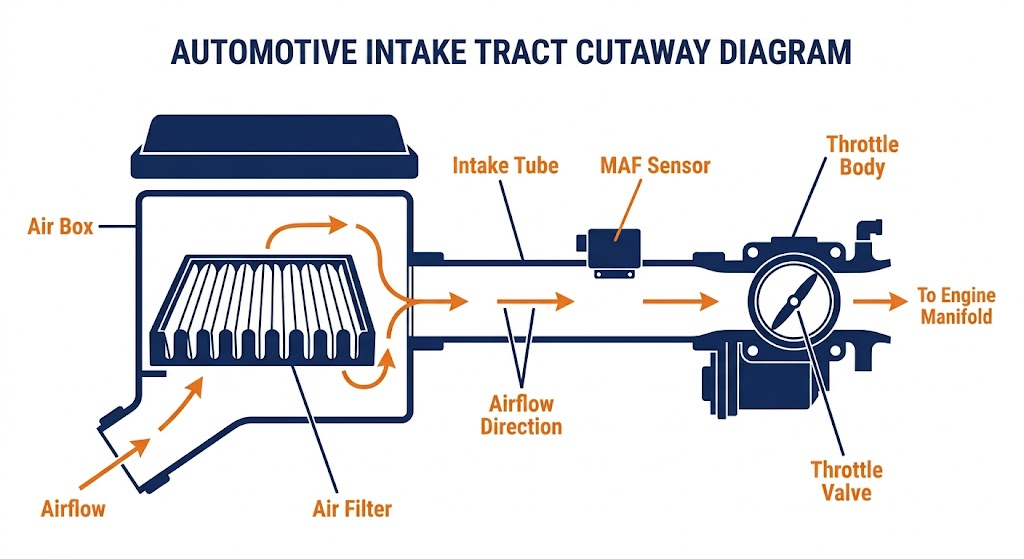
Over-oiling is the most common mistake people make when cleaning a K&N filter. Applying too much oil sends excess oil into the intake tract, where it can coat the mass airflow (MAF) sensor.
Does K&N Filter Oil cause MAF Sensor Failure?
A contaminated MAF sensor reads airflow incorrectly. This causes the engine management system to miscalculate fuel delivery, which can trigger a check engine light, rough idle, hesitation, or reduced fuel economy.
The MAF sensor is located just downstream of the air filter in most vehicles. It is a delicate component. Oil contamination does not always cause immediate failure, but it degrades sensor accuracy over time.
If you suspect over-oiling, let the filter sit for an hour. Excess oil will migrate toward the pleats and settle. Wipe away any visible oil pooling at the filter's base or end caps with a clean cloth before reinstalling.
If you already installed an over-oiled filter and notice rough idle or a check engine light, remove the filter and inspect the MAF sensor. A contaminated sensor can often be cleaned with electrical contact cleaner or MAF-specific cleaner. Do not use general-purpose solvents on a MAF sensor.
When Should You Replace a K&N Filter Instead of Cleaning It?
Cleaning extends the life of a K&N filter, but no filter lasts forever. Replace the filter if you find any of the following during inspection:
- Torn, cracked, or collapsed pleats
- Holes in the cotton gauze media (hold it to a bright light to check)
- A bent, dented, or warped metal frame that prevents a proper seal in the housing
- Heavy oiling that has penetrated the end caps or frame seams
- A filter that has been cleaned 10 or more times (some manufacturers suggest this threshold, though K&N does not specify a hard limit)
Physical damage to the filter media means unfiltered air reaches the engine. That risk outweighs the cost of a replacement filter.
FAQ
How long does a K&N air filter take to dry after cleaning?
K&N says to allow the filter to dry naturally, without specifying an exact timeframe. Plan for several hours at minimum in a warm, well-ventilated area. In humid or cold conditions, allow more time. The filter must be bone dry before you apply oil. Do not use a heat gun or hair dryer to rush it.
Can I use WD-40 or other spray oils to re-oil a K&N filter?
No. WD-40 is a water displacement product, not a filter oil. It does not have the viscosity or tackiness required to trap particles in the cotton gauze media. Using anything other than K&N filter oil or an equivalent cotton gauze filter oil voids the filter's warranty and will degrade its filtration performance.
How do I know if my K&N filter needs cleaning or replacement?
Hold the filter up to a light source after removing it. If light passes through most of the pleats, cleaning is appropriate. If the pleats are completely dark and you cannot see through them, clean first and inspect again. If you find tears, holes, or a damaged frame, replace it.
Does cleaning a K&N filter affect the warranty?
Cleaning the filter with non-K&N products can void the warranty. K&N's warranty requires that the filter be maintained with their own cleaning and oiling products. Using their recharge kit keeps you compliant with the warranty terms.
The Bottom Line
Cleaning a K&N air filter is a straightforward process if you follow the steps in order and do not rush the drying time. Apply cleaner, let it soak, rinse from the inside out, dry completely, apply oil lightly and evenly, and let it settle before reinstalling.
The two most common mistakes are rushing the drying step and applying too much oil. Both lead to problems that could have been avoided with a little patience.
If you are not confident about the process, K&N's recharge kit comes with illustrated instructions. Follow those exactly on the first cleaning. After one full cycle, the process becomes familiar.